
New Tank Plan: First 90 Days
A calm, week-by-week plan for a new aquarium: cycle the filter, stock in waves, and reach a stable tank by day 90 without the beginner crashes.
On this page
Most tanks do not fail because of one dramatic mistake. They fail from small, compounding instability in the early weeks: rushed stocking, skipped tests, one heavy feeding, a filter left off overnight, a panicked chemistry correction. The first 90 days are your stabilization window. Run this period patiently and the next year of fishkeeping becomes dramatically easier.
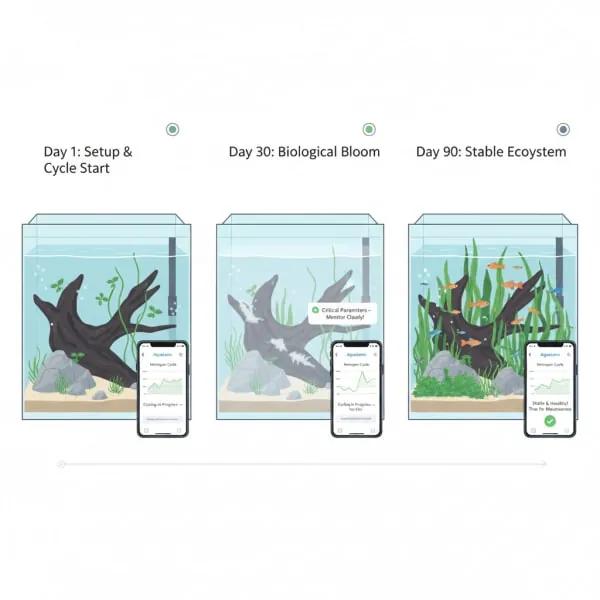
The plan has three phases, and you never overlap them:
- Phase A, Establish (Days 1 to 30): build your biological filter. Nothing living enters until the cycle is proven.
- Phase B, Populate (Days 31 to 60): add livestock in small waves, proving the filter can carry each load before you add the next.
- Phase C, Settle In (Days 61 to 90): tune the tank and build the routines you will use for years.
The one rule that covers everything: build biological stability first, add complexity second, and never both at once.
This roadmap assumes freshwater as the default, with notes for saltwater and reef keepers where the path diverges. If you are still choosing your tank, filter, and first fish, cover that groundwork before day 1.
Before Day 1: Set Up the Plan
Spend ten minutes here and everything downstream gets easier. The goal is a decision record you can look back on, because "what changed?" is the first question in every future problem.
- Pick your livestock on paper first. Run your wishlist through the Build My Tank planner and the stocking calculator before you buy anything. This is the cheapest possible moment to discover that two species you love cannot share a tank, and the stocking and compatibility guide explains the reasoning.
- Confirm the tank is sized right. Check your real water volume (rock and substrate displace more than you think) and make sure your heater and filter are matched to it before anything goes in.
- Log a Day 0 baseline. Record your fill date, water source, dechlorinator and dose, and your first full test: pH, ammonia (NH₃), nitrite (NO₂⁻), nitrate (NO₃⁻), and temperature. Take one photo from a fixed position. In AquaLens, that first scan and photo become the reference point every later reading is measured against.
A clean starting log is worth more than it looks. Every diagnosis you make over the next three months compares back to it.
Phase A, Establish: Days 1 to 30
This is the most important and most misunderstood phase. Your filter media looks inert and your water looks clear, but biologically nothing is ready. You are cultivating two groups of bacteria that barely exist yet:
- Ammonia-oxidizers convert ammonia (fish waste) into nitrite.
- Nitrite-oxidizers convert nitrite into far less harmful nitrate.
Until both colonies are established and proven, the tank cannot safely hold fish. The fishless cycling guide goes deep on the biology; this section is the calendar. The cycle calculator will estimate your finish date, and AquaLens's cycle tracker does the same live: it reads each logged test, tells you which of the three phases you are in, and updates its projection from your tank's actual conversion rate rather than a generic calendar. Log a test every day during cycling; the more data points it has, the tighter the estimate.
Days 1 to 7: Start the cycle
- Fill the tank. Run the filter and heater 24/7 and never switch them off.
- Add an ammonia source to feed the bacteria. Fishless (recommended): dose pure ammonium chloride to 2 to 4 ppm, the cleanest and fastest method. Fish-in: add two or three very hardy fish such as zebra danios, feed once daily and very lightly. Fish-in works but is harder on the animals.
- Run your light on its normal schedule now so the routine is set. Bacteria do not care about light.
- Log a full test every day.
Expect a brief cloudy bloom (harmless), ammonia sitting at 2 to 4 ppm, and nitrite and nitrate at zero. Do not add fish to a fishless tank, do not clean or replace filter media, and do not add untreated tap water: chlorine kills the bacteria you are trying to grow. Nothing looking like it is happening is the normal lag phase, not a failure.
Days 8 to 14: The lag phase
Continue daily tests. Keep a fishless tank topped to 2 to 4 ppm ammonia. Watch for the first faint nitrite reading, which confirms the first colony has arrived and is doing its job. Ammonia may start dropping a little more predictably. Do not perform large water changes yet unless ammonia climbs dangerously high (above roughly 8 ppm in a fishless tank), and do not add more fish to a fish-in cycle: the filter is not ready.
Days 15 to 25: The nitrite spike
This is the hardest stretch to wait through. Keep dosing a fishless tank to 1 to 2 ppm ammonia, feeding the first colony while the second builds. Nitrite will climb, sometimes off the top of your test chart, and that is expected. You should see ammonia processing get faster and the first nitrate appear, which means the full chain is forming.
If you are cycling with fish and nitrite goes extremely high, a 25 to 30% water change brings it down to a safer level without crashing the colony. Log the change with its volume and reason. If you are unsure whether a given reading warrants action, AquaGuide chat can answer with your tank volume and current numbers in view; it is free for a few questions a day.
Days 26 to 30: Cycle completion and the stress test
When a fishless tank clears 2 ppm of ammonia to zero, and nitrite to zero, within 24 hours, run the confirmation test:
- Dose ammonia to exactly 2.0 ppm.
- Wait exactly 24 hours.
- Test. Both ammonia and nitrite must read zero.
Pass it and you do one large water change (50 to 70%) to clear the accumulated nitrate, then move to Phase B. The cycle tracker flipping to complete is your clearance to add fish; do not skip the stress test to get there faster. If the tank does not pass, the second colony is not fully established. Keep going another week, log daily, and retest. A delayed cycle is far safer than an early one. Whatever you do in Phase A, never throw away filter media, never chase speed with a shelf of additives, and never trust clear water over an actual test.
Phase B, Populate: Days 31 to 60
Your filter is proven. Now you add fish, carefully. The bacterial colony is sized for exactly the ammonia load it has been processing. Add too much new bioload at once and you overwhelm it, producing an ammonia spike that stresses or kills the fish you just bought.
The golden rule of stocking: add roughly 25 to 35% of your intended final stock in the first wave, let the colony adjust for about two weeks, then add the next wave.
Days 31 to 35: First fish
Before the store, re-check your first wave against your stocking plan; you want to be comfortably under half your final capacity at this stage. At the store, buy only that first wave, and ask about their water parameters: a large gap from yours means a slower acclimation.
Acclimate properly. Float the sealed bag for 15 to 20 minutes to match temperature, then drip-acclimate for 45 to 60 minutes for sensitive species, shrimp, or anything marine. Net the fish into the tank rather than pouring in bag water. Keep the lights dim or off for the first 24 hours and do not feed on arrival day; let them settle. The acclimation guide covers the drip method and the differences between species in detail. Log the new residents (this updates your bioload) and note the acclimation method you used.
Days 36 to 42: The post-stocking watch
This fortnight is where a new tank is most likely to stumble, so test ammonia, nitrite, and nitrate every one to two days and log each result. You are looking for ammonia and nitrite holding at zero (the filter is carrying the new load), active fish, good color, and a feeding response within 48 hours. Feed once daily, only what is eaten in about 60 seconds; overfeeding is the single most common cause of ammonia spikes in a new tank, and the feeding guide is worth reading before your first meal.
Act immediately on red flags:
- Ammonia or nitrite above zero: stop feeding, do a 30% water change, retest in 24 hours.
- Surface gasping: increase surface agitation and aeration at once, test, and change water if needed.
- Not eating after 48 hours: check parameters first; if the water is clean, look up the species or ask AquaGuide.
Because each test photo you scan is auto-logged with a timestamp, that fortnight becomes a clean diagnostic trail if you ever need to escalate a problem.
Days 43 to 60: Establishment, plants, and first corals
If the first two weeks stayed stable, add a second small wave, bringing total bioload to around 50 to 60% of capacity. Re-check compatibility for anything new and log every addition.
Freshwater planted tanks: by now plants have had four to six weeks to root and should show new growth. Start a real dosing routine, sizing fertilizer with the dosing calculator, and set it as a repeating schedule so each dose auto-logs with the exact amount. Hold off on raising light intensity until dosing is steady: high light without matching nutrients and CO₂ is the number one cause of early algae. The planted lighting guide covers that balance, and if algae is already creeping in, start with the algae control guide. Still deciding what to grow or where to buy it? The guide to choosing aquarium plants and the where to buy plants guide are the two to read.
Saltwater and reef: first corals can go in now if fish are stable and parameters are clean. Start with forgiving species (mushrooms, zoanthids, leathers, Duncan coral) and place them thoughtfully using the coral placement, flow, and lighting guide. Begin tracking alkalinity every two to three days, the most important reef parameter to log consistently, and use the reef dosing calculator to size any two-part additions. The reef parameters guide sets the target ranges, and the saltwater hub collects the rest of the marine library. Avoid the two classic Phase B mistakes: adding more than one new species group per week, and raising light before your dosing and CO₂ are stable.
Phase C, Settle In: Days 61 to 90
By now the tank has a rhythm. Parameters are predictable, fish are settled, and the hard work of cycling is behind you. This phase is about turning startup mode into the sustainable system you will run for years.
Days 61 to 75: Dial in and start reading trends
If the last month was stable, bring stocking up toward 75 to 85% of capacity, re-checking your headroom before each addition. Do not push to 100%; leave a buffer for the unexpected.
This is the first point where you have enough logged history for trends to mean anything, so use them. Open your parameter charts and read the slopes, not the single readings: Is nitrate climbing faster than your water change cadence can control? Is KH slowly declining, which is easy to miss test by test but obvious on a chart? A rising nitrate line usually means more frequent water changes or less feeding, and the water test interpretation guide explains how to tell real drift from ordinary noise.
This is also when predictive alerts earn their keep. In AquaLens, this Pro feature watches your own tank's history and warns you when a parameter is trending toward trouble before it crosses a line. Set them at your personal warning level, not at crisis level: for freshwater, nitrate high, pH low, and KH low; for reef, alkalinity low, nitrate high, and phosphate high. The point is to catch drift early, while a small correction still fixes it.
Days 76 to 90: Build your standing routine
The goal of the whole 90 days is a set of habits that keep the tank stable with minimal firefighting. Lock those in now:
- Set your maintenance schedule. Decide your water change cadence (the water change calculator sizes each one from your nitrate trend) and put it, plus any recurring tasks (CO₂ cylinder checks, filter rinses, reactor media, ICP tests for reef), on repeating phone reminders that log themselves when you mark them done.
- Confirm the equipment still fits. As stocking approaches its target, re-check filter flow, heater sizing, and, for reef, salinity and dosing. What was right at 40% stock can be undersized at 85%.
- Track the money if it matters to you. AquaLens's financial tracker keeps a running tally of spending, energy and water cost per month, and any income, such as frags or fry you sell.
Day 90, what success looks like. Ammonia and nitrite consistently at zero. Nitrate predictable and controlled by your water change schedule. Fish active, feeding confidently, well colored. Plants visibly growing (freshwater) or corals showing steady polyp extension (reef). No emergency interventions in the last 30 days. Reminders running on schedule and predictive alerts quiet. A month of trend charts you can actually read. If you are here, the startup phase is over: you are maintaining, not firefighting.
Doing This With AquaLens
The whole plan turns on one question: is the tank actually ready for the next step, or am I guessing? AquaLens answers it phase by phase.
- Phase A is the cycle tracker's job. It reads each logged test, tells you which phase your bacteria are in, guides fishless or fish-in dosing, and projects your finish date from your tank's real conversion rate instead of a generic calendar.
- Phases B and C run on the trend charts. Once you have a few weeks of logged history, the ammonia, nitrite, and nitrate lines expose drift you cannot see reading numbers one at a time, and Pro predictive alerts nudge you when a parameter trends toward trouble before it crosses a line, which is exactly how a post-stocking mini-cycle gets caught early.
Get AquaLens free and set up your Day 0 baseline before you fill the tank. Core logging needs no account and runs in the app or any browser.
Quick Reference by Phase
| Phase | Test cadence | Water changes | Key focus |
|---|---|---|---|
| A (Days 1 to 30) | Every day | Only if nitrite exceeds ~5 ppm (fish-in) | Grow and prove the biofilter; log daily |
| B (Days 31 to 60) | Every 1 to 2 days after each stocking, then weekly | Weekly, sized to nitrate | Stock in waves; watch feeding and behavior |
| C (Days 61 to 90) | Weekly | Weekly, driven by nitrate trend | Read trends, set alerts, lock in routine |
Troubleshooting the First 90 Days
Fish gasping at the surface. Increase surface agitation and aeration immediately, then test ammonia and nitrite. If either is above zero, stop feeding and do a 30 to 50% water change with temperature-matched, dechlorinated water, and do not feed again until both read zero.
Cloudy water. A white haze in the first two weeks is a harmless bacterial bloom; leave it alone unless a test shows toxicity. Grey or brown turbidity is disturbed substrate or detritus and will clear as the filter runs. Test first: if parameters are clean, the cloud is cosmetic.
Algae before fish are added. Common in weeks four to six as the tank matures and nutrients sit out of balance. Reduce the photoperiod by an hour, check again in a week, remove algae physically, and stabilize before you touch nutrients. Do not spike nutrients trying to out-compete it; fix the light and balance first.
Ammonia or nitrite after stocking. A biofilter overload event. Stop feeding, do a 30 to 50% water change, retest in 24 hours, and hold off adding more fish until it clears. Log the whole sequence; it is your diagnostic trail.
A fish dies early. Test water first, since chemistry is the most common cause. Log the loss with date, species, and suspected cause, and if more than one dies in the same week, look for a pattern in your logs. If disease is the suspect, the fish health and quarantine guide covers isolation and treatment, and reef keepers should use the marine quarantine guide, since ich and velvet behave differently in salt water.
The One Rule
New tanks rarely fail because their owners care too little. They fail because their owners change too much, too fast, with too little patience. The cycle tracker, the log, the trend charts, and the calculators all serve a single purpose: helping you know when the system is actually ready for the next step rather than guessing. Follow the data, trust the process, and the tank will get there. If something goes sideways along the way, the help center and AquaGuide are one tap away.
Frequently Asked Questions
How long does it take to cycle a new aquarium?
A fishless cycle usually takes about three to six weeks, and a fish-in cycle is often similar or a little longer because you cannot dose ammonia freely. The tank is cycled when it can clear 2 ppm of ammonia and all the resulting nitrite to zero within 24 hours. Testing daily and logging every result gives you the most accurate finish date, since the timeline depends on your temperature, pH, and starting bacteria.
When can I add fish to a new tank?
Add fish only after the tank passes the 24 hour stress test: dose ammonia to 2 ppm, wait a full day, and confirm both ammonia and nitrite read zero. Then do a large water change to clear the accumulated nitrate before stocking. Adding fish before the cycle is proven is the most common cause of early losses in a new tank.
How many fish should I add at once to a new tank?
Add only about 25 to 35 percent of your intended final stocking in the first wave, then wait roughly two weeks before adding more. Your bacterial colony is sized for the load it has been processing, and it grows slowly, so a large sudden addition can overwhelm it and spike ammonia. Test every one to two days after each stocking event and only add the next wave once the water stays stable.
Why is my new tank water cloudy?
A white or milky haze in the first couple of weeks is almost always a harmless bacterial bloom as the biological filter establishes. Leave it alone unless a test shows ammonia or nitrite. Grey or brown cloudiness is usually disturbed substrate or suspended detritus and clears on its own as the filter runs.
Should I do a fishless or fish-in cycle?
A fishless cycle using pure ammonium chloride is cleaner, faster, and does not stress any animals, so it is the recommended method for most beginners. A fish-in cycle with a few very hardy fish works but requires light feeding, frequent testing, and small water changes to keep ammonia and nitrite from harming the fish. Both reach the same endpoint of a fully established biofilter.
How often should I test water in a new tank?
Test every day during the first 30 days while the tank is cycling, then every one to two days for about two weeks after each stocking event, and weekly once the tank is settled. Daily data during cycling gives the most accurate read on which phase you are in. Consistent testing is what turns individual readings into a trend you can actually act on.
What should ammonia, nitrite, and nitrate read in a cycled tank?
In a fully cycled, stocked tank ammonia and nitrite should both read zero at all times, since any detectable amount is toxic to fish. Nitrate is the harmless end product and will be present; you control it with regular water changes, keeping it low and stable rather than letting it climb. A rising nitrate trend usually means you should change water more often or feed less.
Is my tank cycled if the water is clear?
No. Clear water only means there are no suspended particles; it says nothing about ammonia or nitrite, which are invisible and dissolved. A tank can look perfectly clear while carrying toxic ammonia. The only way to confirm a cycle is a test that shows ammonia and nitrite at zero with nitrate present.
Launch Your Tank With a Plan
AquaLens runs the first 90 days with you: the cycle tracker reads each test photo and tells you which phase you are in, every scan and dose auto-logs, and trend charts plus predictive alerts catch drift before it becomes a crash.
Keep reading
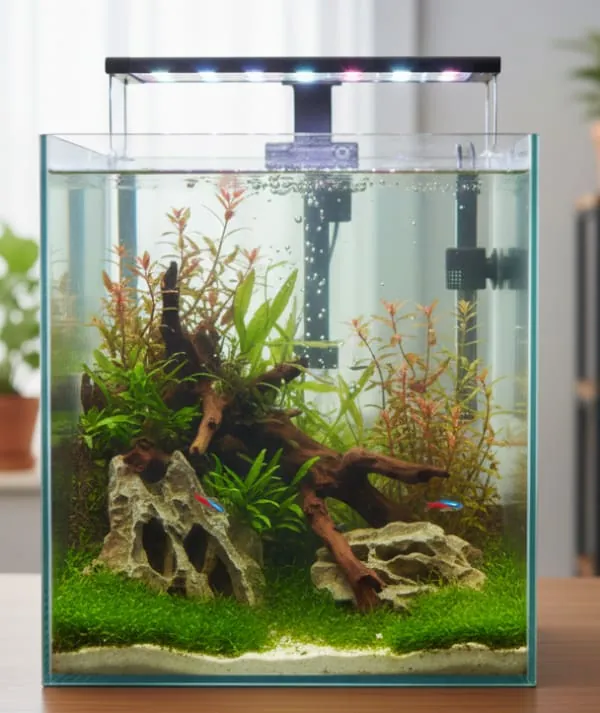
A beginner's guide to your first aquarium: what to buy, how to cycle before any fish arrive, which numbers to watch, and the weekly routine.
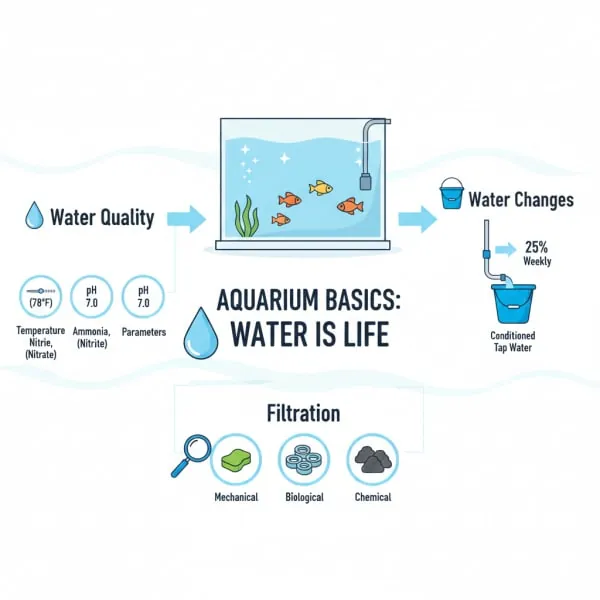
Aquarium basics for beginners: why you keep water not fish, plus tank size, filtration turnover, the nitrogen cycle, and a steady maintenance rhythm.
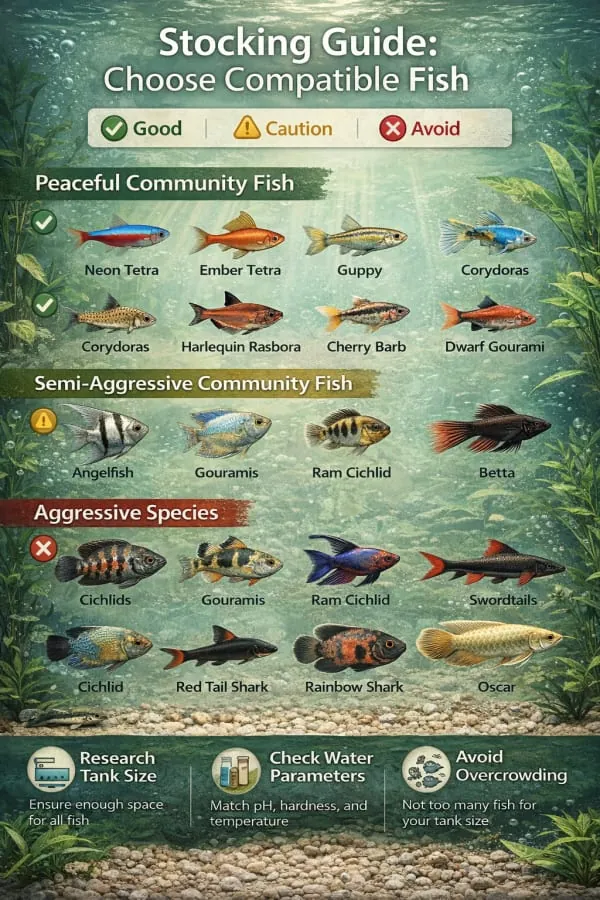
Choose compatible fish: school sizes, swimming zones, aggression, temperature and hardness matching, and honest bioload math for a peaceful community.